
Database Replication
Set Up MariaDB Master-Slave Replication on Linux[Ubuntu 20.04]
In this tutorial, I’ll show you how to set up MariaDB Master-Slave Replication on Linux (Ubuntu 20.04). A sizable community supports the development, security, and improvement of MariaDB, which is a fork of the MySQL relational database management system.
The ability to replicate data from one database server (the master) to one or more additional database servers is known as master-slave replication (the slaves). The updates are logged by the master, and the slaves receive them as a result. In order to permit the delivery of more updates, the slave emits a message indicating that it has successfully received the update. Replication between master and slave can happen synchronously or asynchronously. The fundamental goal of replication is to scale by distributing read and write operations among various servers.
Reasons for MariaDB Master-Slave Replication
- It is feasible to execute backup services on the slave without affecting the matching master data since data is replicated to the slave and the slave has the ability to interrupt the replication process.
- On the master, live data can be created, and the slave can analyze the information without compromising the master’s performance.
- We can utilize replication to produce a local copy of the data for a branch office’s use if they want to operate with a copy of our primary data without needing constant access to the master.
- Distributing the workload across several slaves to enhance performance. In this setup, the master server is where all writes and updates must happen. However, reads may occur on one or more slaves. Since the master is only used for updates, this approach can significantly increase read speed over an expanding number of slaves while improving write performance.
Advantages of MariaDB Master-Slave Replication
- Data must be replicated from the master to a slave before the slave data is backed up in order to employ replication as a backup method. We may effectively create a snapshot of “live” data that would normally require the master to be shut down by pausing and terminating the slave without impacting the master’s ongoing operations.
- There can be instances where we only have one master and want to replicate several databases to various slaves. For instance, to lessen the workload during data analysis, we would want to disperse various sales data to various departments.
- We can configure a master and a slave (or numerous slaves), after which we can create a script that checks on the master to see if it is up. Then tell our programs and the slaves to switch masters in the event of a failure.
- The transfer of the binary log needed for replication can be encrypted using SSL, but both the master and the slave must support SSL network connections. Replication via an SSL connection is not possible if either host does not allow SSL connections. Setting up a server and client using SSL is comparable to setting up replication using an SSL connection.
- Within some realistic bounds, replication can be used as a scale-out option when we want to distribute the workload of database queries over numerous database servers. Replication for scale-out functions best in an environment with a high number of reads and a low number of writes/updates because it distributes data from one master to one or more slaves.
We can now proceed to our demonstration.
Step 1 – Update the System
We will be using Ubuntu 20.04 in this demonstration, run the following command to update the system.
sudo apt update && apt upgrade
sudo reboot
Step 2 – Install MariaDB on Linux
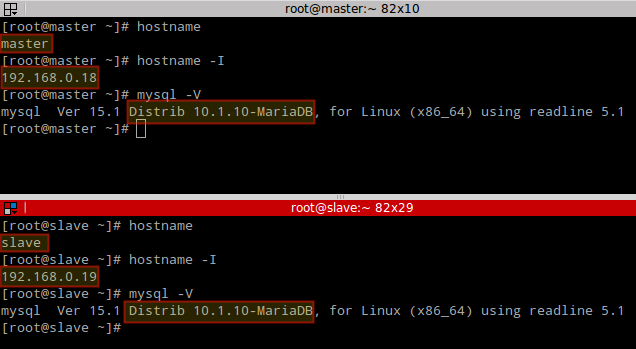
In this demonstration, we’ll set up MariaDB master-slave replication on two nodes that are both running Ubuntu 20.04. The master node will be Node 01, and the slave node will be Node 02.
Node 01: 192.168.56.10
Node 02: 192.168.56.11
Now, install MariaDB in both Nodes:
sudo apt install mariadb-server mariadb-client -yConfirm the status of MariaDB:
$ systemctl status mariadb
 mariadb.service - MariaDB 10.3.34 database server
     Loaded: loaded (/lib/systemd/system/mariadb.service; enabled; vendor preset: enabled)
     Active: active (running) since Wed 2022-06-29 08:37:03 EAT; 1min 9s ago
       Docs: man:mysqld(8)
             https://mariadb.com/kb/en/library/systemd/
   Main PID: 4656 (mysqld)
     Status: "Taking your SQL requests now..."
      Tasks: 31 (limit: 3683)
     Memory: 63.5M
     CGroup: /system.slice/mariadb.service
             └─4656 /usr/sbin/mysqld

Jun 29 08:37:02 bett mysqld[4656]: 2022-06-29  8:37:02 0 [Note] /usr/sbin/mysqld (mysqld 10.3.34-MariaDB-0ubuntu0.20.04.1) starting as process 4656 ...
Jun 29 08:37:03 bett systemd[1]: Started MariaDB 10.3.34 database server.
Jun 29 08:37:03 bett /etc/mysql/debian-start[4691]: Upgrading MySQL tables if necessary.
Jun 29 08:37:03 bett /etc/mysql/debian-start[4694]: Looking for 'mysql' as: /usr/bin/mysql
Jun 29 08:37:03 bett /etc/mysql/debian-start[4694]: Looking for 'mysqlcheck' as: /usr/bin/mysqlcheck
Jun 29 08:37:03 bett /etc/mysql/debian-start[4694]: This installation of MariaDB is already upgraded to 10.3.34-MariaDB.
Jun 29 08:37:03 bett /etc/mysql/debian-start[4694]: There is no need to run mysql_upgrade again for 10.3.34-MariaDB.
Jun 29 08:37:03 bett /etc/mysql/debian-start[4694]: You can use --force if you still want to run mysql_upgrade
Jun 29 08:37:03 bett /etc/mysql/debian-start[4702]: Checking for insecure root accounts.
Jun 29 08:37:03 bett /etc/mysql/debian-start[4706]: Triggering myisam-recover for all MyISAM tables and aria-recover for all Aria tables
After successfully installing MariaDB, you may now protect your database server by following the steps below:
$  sudo mysql_secure_installation

NOTE: RUNNING ALL PARTS OF THIS SCRIPT IS RECOMMENDED FOR ALL MariaDB
      SERVERS IN PRODUCTION USE!  PLEASE READ EACH STEP CAREFULLY!

In order to log into MariaDB to secure it, we'll need the current
password for the root user.  If you've just installed MariaDB, and
you haven't set the root password yet, the password will be blank,
so you should just press enter here.

Enter current password for root (enter for none): <ENTER>
OK, successfully used password, moving on...

Setting the root password ensures that nobody can log into the MariaDB
root user without the proper authorisation.

Set root password? [Y/n] y
New password: <ENTER PASSWORD>
Re-enter new password: <RE-ENTER PASSWORD>
Password updated successfully!

Remove anonymous users? [Y/n] y

Disallow root login remotely? [Y/n] y

Remove test database and access to it? [Y/n] y

Reload privilege tables now? [Y/n] y

Thanks for using MariaDB!
Step 3 – Configure MariaDB Master Server
Use ssh to connect to Node 01 (Master node) after both servers have MariaDB installed, then change the Listening address to the server’s real IP address.
The [mysqld] portion of the file /etc/mysql/mariadb.conf.d/50-server.cnf should be updated with the following line.
$ sudo vim  /etc/mysql/mariadb.conf.d/50-server.cnf
…...
#bind-address           = 127.0.0.1
bind-address             = 192.168.56.10
log_bin = /var/log/mysql/mysql-bin
report-host = mariadb-master1
expire-logs-days = 10
Also, set the server ID for the master server, which will act as a special identification.
server-id = 400Now log in to MariaDB database and create a user for database replication.
$ sudo mysql -u root -p
Enter password: <ENTER PASSWORD>
…...
CREATE USER replica@'%' IDENTIFIED BY 'P@ssword!!';
GRANT REPLICATION SLAVE ON *.* TO replica@'%';
FLUSH PRIVILEGES;
EXIT;
Restart the MariaDB server for the changes to take effect.
sudo systemctl restart mysqlCheck MariaDB if it’s listening on the correct port (port 3306).
$ sudo ss -plunt | grep 3306
tcp     LISTEN   0        80         192.168.56.10:3306           0.0.0.0:*      users (("mysqld",pid=7222,fd=21))
Open port 3306 on frewall.
sudo ufw allow 3306Step 4 – Configure MariaDB Slave Server
Set up MariaDB under [mysqld] by connecting to the slave server(s) as follows:
$ sudo vim /etc/mysql/mariadb.conf.d/50-server.cnf
....
[mysqld]
bind-address = 192.168.56.11
server-id = 200
log_bin = /var/log/mysql/mariadb-bin
report-host = mariadb-slave1
expire-logs-days = 10
Now, restart MariaDB for the changes to take effect:
sudo systemctl restart mysqlStep 5 – Start Replication Process
We should be able to start the replication process on the slave server at this point.
Check the master’s status first:
$ sudo mysql -u root -p
Enter password:
Welcome to the MariaDB monitor.  Commands end with ; or \g.
Your MariaDB connection id is 37
Server version: 10.3.34-MariaDB-0ubuntu0.20.04.1-log Ubuntu 20.04

Copyright (c) 2000, 2018, Oracle, MariaDB Corporation Ab and others.

Type 'help;' or '\h' for help. Type '\c' to clear the current input statement.

MariaDB [(none)]> show master status\G
*************************** 1. row ***************************
            File: mysql-bin.000001
        Position: 328
    Binlog_Do_DB:
Binlog_Ignore_DB:
1 row in set (0.000 sec)
Keep track of the location of the current Master log file. Configure the slave server later using the data you gleaned from the master status command.
Log in to the MariaDB Slave server as the root user and set up the connection to the Master server.
$ sudo mysql -u root -p
CHANGE MASTER TO MASTER_HOST='192.168.56.10',
MASTER_USER='replica',
MASTER_PASSWORD='P@ssword!!',
MASTER_LOG_FILE='mysql-bin.000001',
MASTER_LOG_POS=328;
Begin replication now on the Slave Server:
MariaDB [(none)]> start slave;
Query OK, 0 rows affected (0.002 sec)
Use the following command to terminate the slave:
MariaDB [(none)]> stop slave;
Query OK, 0 rows affected (0.045 sec)
Now, start slave synchronization.
START SLAVE IO_THREAD;  #Start IO process
START SLAVE SQL_THREAD; #Start SQL process
START SLAVE;            #Start IO and SQL process
Reset the slave’s synchronization. The slave must first be stopped in order to reset.
MariaDB [(none)]> RESET SLAVE;
Query OK, 0 rows affected (0.010 sec)
Check the status of a Slave as follows:
MariaDB [(none)]> show slave status\G
*************************** 1. row ***************************
                Slave_IO_State: Waiting for master to send event
                   Master_Host: 192.168.56.10
                   Master_User: replica
                   Master_Port: 3306
                 Connect_Retry: 60
               Master_Log_File: mysql-bin.000001
           Read_Master_Log_Pos: 328
                Relay_Log_File: mysqld-relay-bin.000002
                 Relay_Log_Pos: 555
         Relay_Master_Log_File: mysql-bin.000001
              Slave_IO_Running: Yes
             Slave_SQL_Running: Yes
               Replicate_Do_DB:
           Replicate_Ignore_DB:
            Replicate_Do_Table:
        Replicate_Ignore_Table:
       Replicate_Wild_Do_Table:
   Replicate_Wild_Ignore_Table:
                    Last_Errno: 0
                    Last_Error:
                  Skip_Counter: 0
           Exec_Master_Log_Pos: 328
               Relay_Log_Space: 865
               Until_Condition: None
                Until_Log_File:
                 Until_Log_Pos: 0
            Master_SSL_Allowed: No
            Master_SSL_CA_File:
            Master_SSL_CA_Path:
               Master_SSL_Cert:
             Master_SSL_Cipher:
                Master_SSL_Key:
         Seconds_Behind_Master: 0
Master_SSL_Verify_Server_Cert: No
                 Last_IO_Errno: 0
                 Last_IO_Error:
                Last_SQL_Errno: 0
                Last_SQL_Error:
   Replicate_Ignore_Server_Ids:
              Master_Server_Id: 400
                Master_SSL_Crl:
            Master_SSL_Crlpath:
                    Using_Gtid: No
                   Gtid_IO_Pos:
       Replicate_Do_Domain_Ids:
   Replicate_Ignore_Domain_Ids:
                 Parallel_Mode: conservative
                     SQL_Delay: 0
           SQL_Remaining_Delay: NULL
       Slave_SQL_Running_State: Slave has read all relay log; waiting for the slave I/O thread to update it
              Slave_DDL_Groups: 0
Slave_Non_Transactional_Groups: 0
    Slave_Transactional_Groups: 0
1 row in set (0.000 sec)
Step 6 – Test MariaDB Database Replication
On the Master node, create a sample database and fill it with the information displayed below:
CREATE DATABASE cars;
create table cars.cars_details (car_no VARCHAR(20), car_color VARCHAR(20), car_name VARCHAR(20));
INSERT INTO cars.cars_details (car_no, car_color, car_name) VALUES (744, 'yellow', 'BMW');
INSERT INTO cars.cars_details (car_no, car_color, car_name) VALUES (350, 'grey', 'Mazda');
Verify that the slave can see the database:
MariaDB [(none)]> show databases;
+--------------------+
| Database           |
+--------------------+
| cars               |
| information_schema |
| mysql              |
| performance_schema |
+--------------------+
4 rows in set (0.001 sec)
Check to determine if the slave server has the same table that was created on the master server:
MariaDB [(none)]> select * from cars.cars_details;
+--------+-----------+----------+
| car_no | car_color | car_name |
+--------+-----------+----------+
| 744    | yellow    | BMW      |
| 350    | grey      | Mazda    |
+--------+-----------+----------+
2 rows in set (0.001 sec)
Closing Thoughts
Up to this point, we have successfully configured MariaDB Master-Slave Replication on Linux (Ubuntu 20.04). We benefited from this. Master-Slave Replication should always be used to prevent data loss.
Author’s Bio
Frank, is an IT enthusiast who thrives on pushing his limits! He’s skilled in cloud computing, system admin, networking, virtualization, containerization, and automation. Twitter: @Kipko_Frankline LinkedIn: Frankline Bett